Venture below for the forum of The Brethren Court!

If you would like to add information or you find dead links to pictures or sites please send an email to the administrators
![]()


Venture below for the forum of The Brethren Court!
If you would like to add information or you find dead links to pictures or sites please send an email to the administrators
Wrist Wrap Tutorial
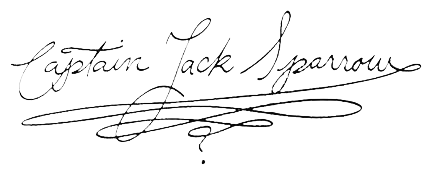
"Ah-ha! So, we’ve established my proposal as sound in principle. Now, we’re just haggling over price." ~ Jack Sparow
Dead Man's Chest
Tutorial by Mojo from brethrencourt.net
Jack's black wristband is one of those items that doesn't have a lot of resources. It's actual make up is still unknown and each costumer has his or her own approach to it. It's been identified as everything from a scarf to a torn piece from a lady's garment. The item also seems to change appearance from movie to movie, so no wristwrap ever looks the same. Most costumers can get away with just wearing a black wrapped piece of fabric around their right wrist.
After several trips to the fabric store and after staring at reference pictures for hours on end, I believe that this item wasn't "found" but actually hand woven on a loom. It appears to be made from black crochet thread (weight 2).
Then there is the colored thread dashes. Some costumers believe there are actually three colors, I actually believe there are only two and that what is sometimes seen as a third color is a distressed color, or lighting. Again, the actual colors are unknown, but they appear to be a shade of yellow and a shade of magenta.
I can only offer a tutorial based off the wristwrap I made and since nobody knows exactly what the screen used item looks like, take it for what it's worth.
My first stage was getting the materials - I ended up going with black burlap from Joanne's and two colors of yarn from Wal-Mart. All of the materials together was easily under $10. The real expense of this project is in the time and labor.
The Yarn
Black Burlap
The second step was cutting the burlap to the right measurement. What I did was pull up a picture of Jack's wrist and then take a measurement against my own wrist of how wide I thought the wristwrap was. I decided on 4 1/2 inches. Then we wrapped the cut piece of fabric out from the burlap and wrapped it around my wrist twice to see how long it would need to be. I decided on 29 inches.
The third step was hand stitching the surrounding 4 sides. Using a needle and black thread I went around all 4 edges and hand stitched a seam almost half an inch into the garment. This was to ensure the stability of the fabric once the edges had been frayed. The thing with burlap and many of these woven fabrics is, once you begin weathering them - they could begin to fall apart on you very quickly. I had previously tried to make a wristwrap using monks cloth and it was a total disaster. I then went around all four edges and begin pulling out lengths of burlap to fray the edges.
The fourth step was beginning to add the colors. Like I said earlier, this is always done differently from costumer to costumer. No two wristwraps are ever the same - so I would first advise you to stare at reference photos until your eyes bleed. Even if you plan to buy one , make sure you are getting something that you won't be disappointed with later. That said, on my costume piece each color was hand stitched counting the criss cross weave pattern in the burlap to ensure each dash and line was the same size and even with the bar beneath it.
Pattern Detail
This is a brightened and enlarged photo so that you can see how each dash was added. If it were Morse Code it would be dashes and lines. Each "line" is the same length and stands above and below a line exactly the same length in exactly the same column. Again, I can not stress this enough - this was my own personal take on what I thought the wristwrap looked like. You may see something from a reference picture that I don't see, or you may agree with a different costumer's take. Each "dash" was grouped into three short spurts and evenly placed beneath a corresponding line.
The color pattern I picked from the top down was 1 magenta and 3 yellows and then I repeated the pattern once.
Once the colors were finished, it looked like this...
Completed Wristwrap
The fifth step - Widthwise the wristwrap was run through the sewing machine in about five places - this was done as a "securing" process so that once weathering and washing took place, the wristwrap would continue to hold it's shape.
The sixth step was wrapping the garment around my wrist again and tying it off. Then I took some scissors and began to cut and weather the edges. I made them look worn and ratty and pulled out threads. Then I filled the sink with hot water, soap and coffee and let the wristwrap sit for a few hours. Burlap has a hard starchy feeling and I wanted the bright colors to wash with the black burlap dye to create a more weathered and aged process.
Completed Prop:
And this is what it looks like tied and with the rest of my costume...
* If you would like to add information or you find dead links to pictures or sites please send an email to the administrators